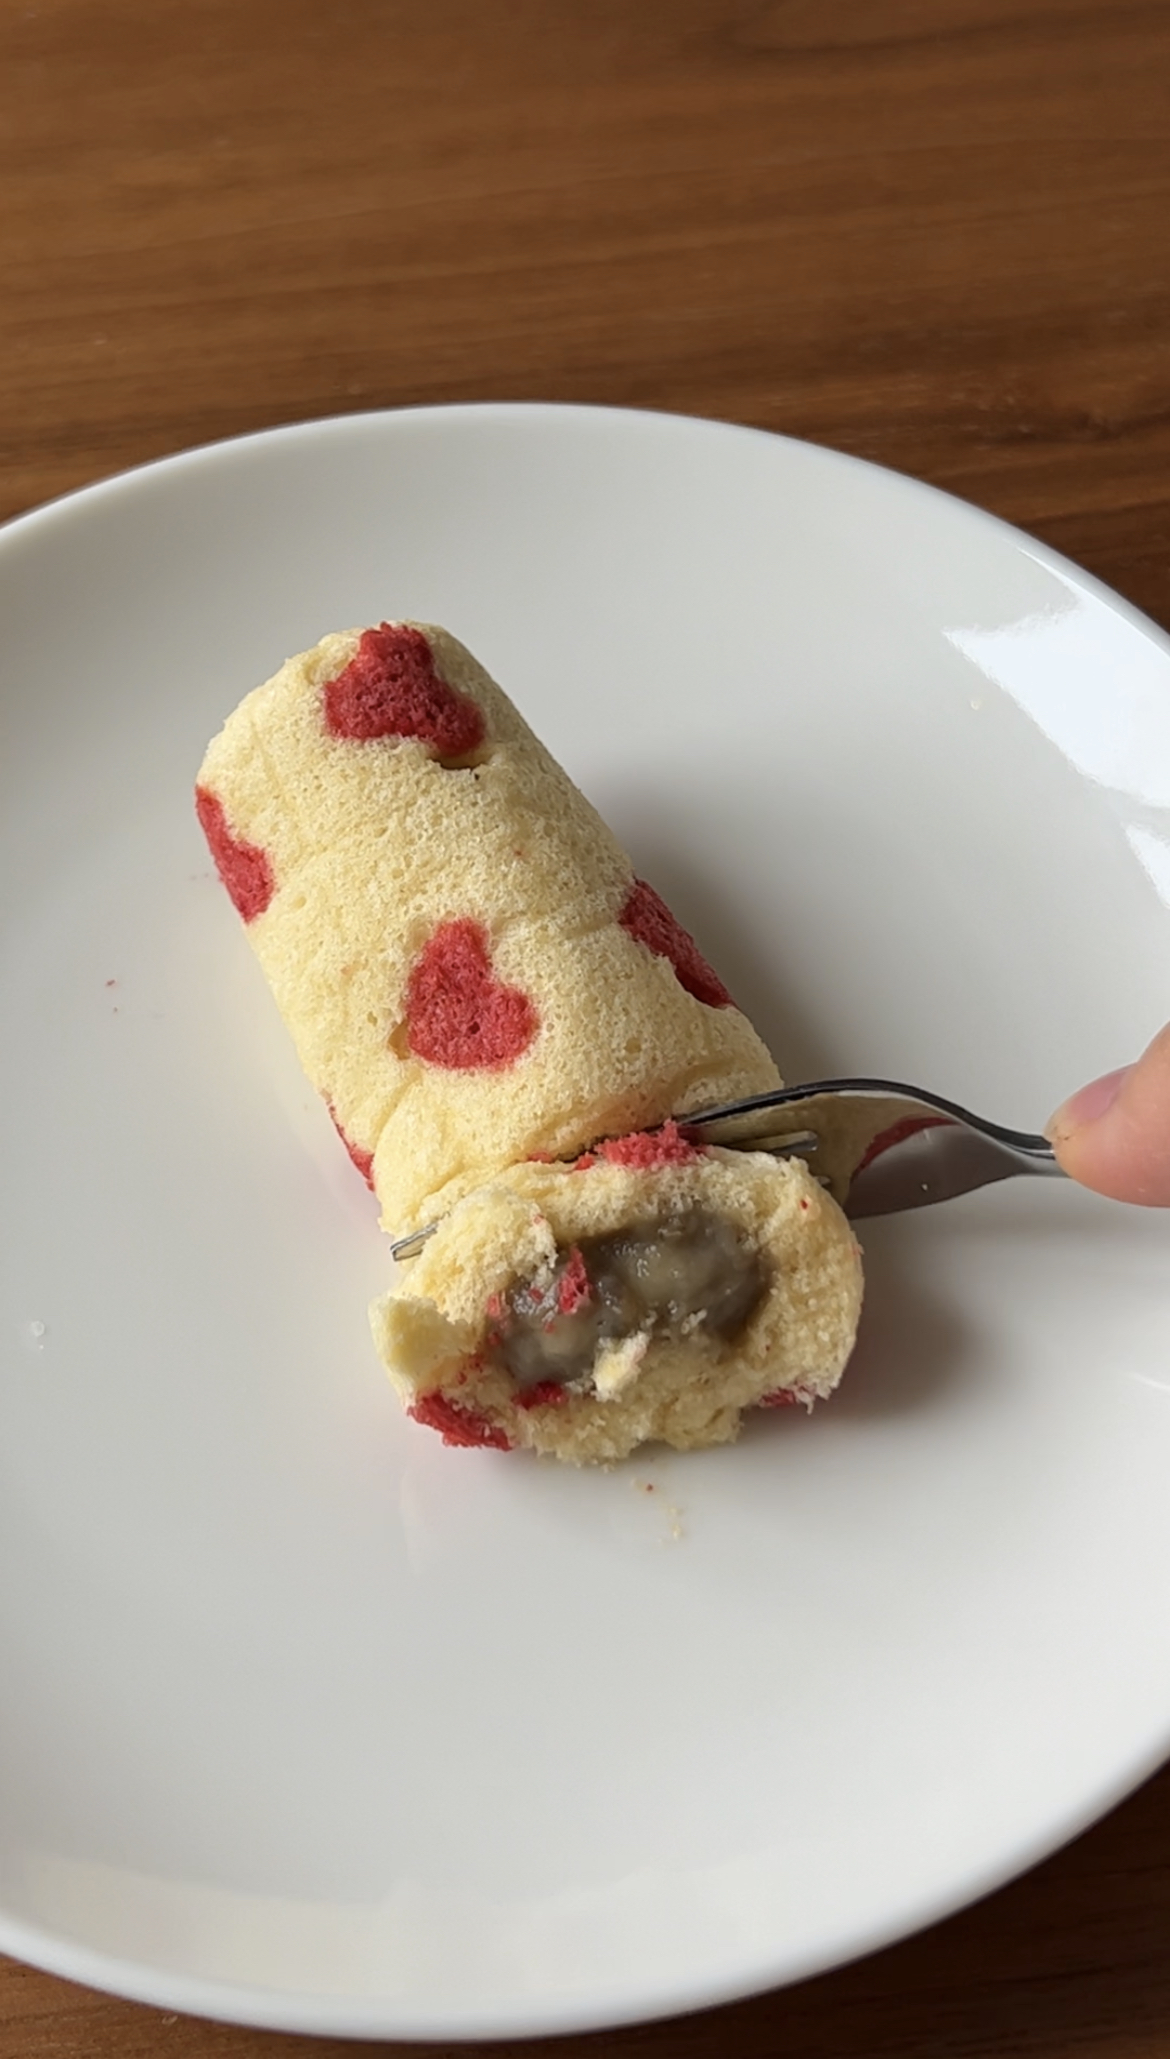
Homemade Tokyo Banana (Valentine’s Day Edition)

2024年2月14日
Cutting into a homemade Tokyo Banana

Here is how you can make the most popular Tokyo souvenir — Tokyo Banana but from the comfort of your own home with a Valentine’s Day twist! If you’ve ever been to Tokyo, you’ve probably seen Tokyo Bananas sold at every souvenir shop ever. They are a wide banana shaped fluffy cake with a creamy banana custard inside that is the perfect sweetness and loved by many! They come in all kinds of designs and flavors, including a heart one that I wanted to recreate at home — perfect for Valentine’s Day!

INGREDIENTS

Tokyo Banana Cake:

Banana Cream:

DIRECTIONS:

Estimated Time: 2.5 hours

  1. In a pot, simmer the milk and vanilla on low heat just until steam comes off the milk.
  2. In a bowl, mix together the egg yolk and sugar before sifting in the flour.
  3. Add in the hot milk in two parts and mix quickly to prevent the egg from cooking too much.
  4. Run the mixture through a sieve back into the original pot that was used to heat the milk.
  5. Cook the custard mixture on medium heat and continuously mix to create a smooth custard.
  6. Once you get a shiny and thick custard paste, add in the banana paste and mix.
  7. Once the banana is fully mixed in, pour the mixture onto a flat plate, cover with plastic wrap and let it cool in the fridge while you bake the cake.
  8. Preheat oven to 375 F or 190 C.
  9. With an electric whisk, beat 3 egg whites until it is a bit frothy then add 1/2 of the granulated sugar.
  10. Once a meringue starts to form, add in the other half of the sugar and continuing beating until a meringue with stiff peaks forms.
  11. On low speed, add in the 3 egg yolks until fully incorporated with the meringue.
  12. Sift in the cake flour in two parts then cut in fold to incorporate into the meringue mixture (do not overmix!)
  13. Before mixing in the flour entirely, add in the milk/oil/vanilla mixture and fold into the batter until the flour is completely mixed in.
  14. Take 1/8 of a cup of batter and pour into another bowl to mix in with the red food coloring.
  15. Put the red batter into a piping bag and pipe out hearts into the parchment paper lined shallow cake pan or create your own like I learned here.
  16. Once you are done piping out the hearts, pour out the rest of the cake batter over the hearts GENTLY to be sure you don’t ruin the hearts you just piped out.
  17. Be sure the batter is even in the pan to ensure that it bakes flat.
  18. Tap the pan on the counter a 3-5 times to release the big air bubbles.
  19. Bake for 10-12 minutes until it is golden brown on top.
  20. Once the cake is done baking, flip it over onto a cake cooler and remove the parchment paper, then cover in plastic wrap to prevent the cake from drying out.
  21. While the cake is cooling, put the banana cream into a piping bag with a medium circle tip.
  22. With the golden brown side of the cake facing up, cut the sheet cake into 4 rectangles.
  23. Pipe the banana custard into the middle of each rectangle.
  24. Roll each piece up and place onto a large piece of plastic wrap to be able to twist the edges (this creates the rounded ends of the Tokyo Banana). Secure the ends with tape. Repeat this 4 times. (*See video for demonstration)
  25. Put the cakes into a small round bowl to let the cakes set into a slightly rounded shape (like a banana).
  26. Let the cakes cool in the fridge for at least 40 minutes before unwrapping from the plastic wrap.
  27. Serve and enjoy! Itadakimas! (The banana in the cream may change colors depending on how late you enjoy the cakes but it doesn’t impact the flavor of the cake!)

NOTES:

Tag me on Instagram or Tik Tok at @takahasheats if you make it! Happy Valentine’s Day <3

Leave a Reply

Your email address will not be published. Required fields are marked *