Shio-pan pull apart rolls (Japanese salt bread)

2026年7月2日

If you’ve grown up around me, you already know this about my house: my Japanese mom’s top priority the second you stepped through the door was making sure you had food in front of you. No exceptions.

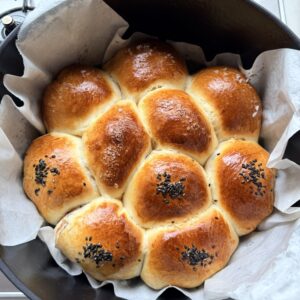
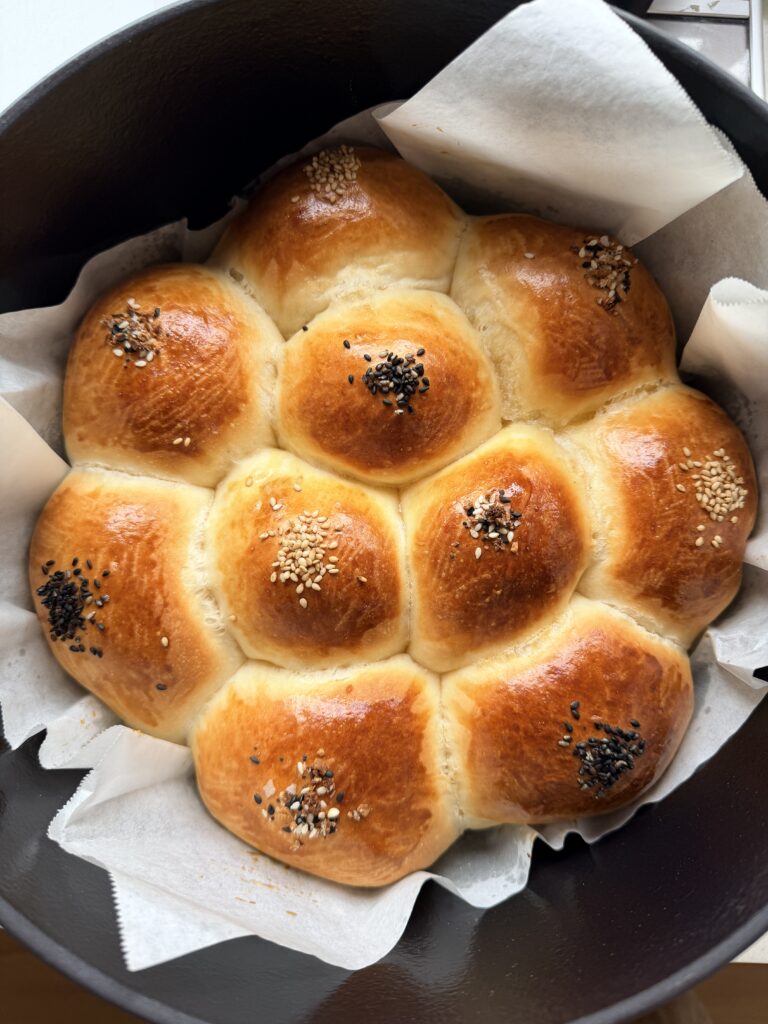
And out of everything she baked, this is one of my many favorites — her shio-pan (塩パン), or Japanese salt bread. Except her version isn’t shaped like the crescent rolls that have gone viral this past year. My mom bakes hers in a ramekin, so the butter melts out of the dough while it’s baking and then gets reabsorbed right back into the bottom, giving you the crispiest crust while the top stays impossibly fluffy.

There’s a phrase in Japanese, おふくろの味 or “ofukuro no aji”, that literally means “mom’s taste.” 味 or “aji” means flavor, and おふくろ is this slightly old-fashioned, kind of informal way of saying “mom” (お母さん “oka-san” or まま “mama” feels a little too “cute” for the men who usually use it). Nobody really says おふくろ anymore, but the phrase stuck around for exactly this reason — that specific flavor that instantly pulls up a flood of memories the second it hits your tongue.

This version bakes up beautifully in the Vermicular Oven Pot 2.0, which honestly might be the best thing that’s ever happened to my bread. Just like my mom’s ramekin trick, the enamel finish and even heat distribution eliminates extra moisture as it bakes, so that buttery goodness oozes out and gets reabsorbed right back into the bottom for that same crispy, delightful crust, except now in one big shareable pot instead of individual ramekins. If you’ve been wanting an excuse to bake bread in it, this is the one!

Why You’ll Love This Shio Pan Recipe

Shio Pan Pull-Apart Bread Ingredients

For the dough:

For the filling and topping:

A Few Tips

I cannot wait for you to make this one. It’s soft, salty, buttery, and it’s my おふくろの味, the flavor that instantly brings me right back to my mom’s kitchen. I have a feeling it might become one of yours too 🙂

A Great Pairing: My Mom’s Japanese-Style Minestrone

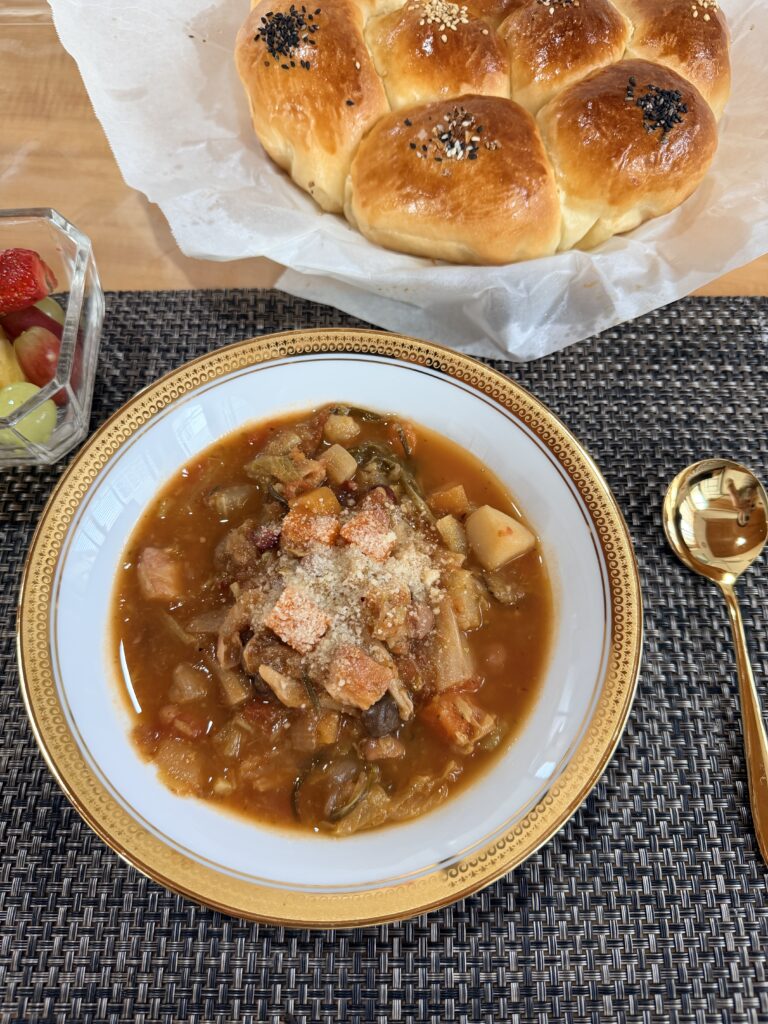
If you watched the video, you know this bread doesn’t stand alone. My mom always made her minestrone right alongside her shio-pan, and it’s one of my favorite soups she’d make me growing up. It’s basically how she got a ton of veggies into me as a kid without me even noticing, and it has this subtle “wa” flavor from a little dashi and soy sauce stirred in at the end.

Honestly, this one isn’t really a recipe so much as a method. I just chopped everything up, cooked it down, and seasoned it at the end. That’s it. That’s the whole thing. And made in the Oven Pot 2.0, I didn’t even need to add water since the precision seal keeps all that veggie broth from evaporating out, so you end up with the most flavorful base without doing anything extra.

Ingredients:

Chop everything up, toss it all in the pot, and let it cook down until everything’s soft and the flavors have melded together. Right at the end, tear open the dashi packet and stir it in, add your soy sauce to taste, and finish with parmesan if you’re feeling it. Simple as that, and it pairs perfectly with a warm piece of this shio-pan.

Tag me on all socials @takahasheats if you bake these, and let me know what you think!

Itadakimas!

Shio-pan pull apart bread (Japanese salt bread)

My mom's shio-pan, made pull-apart and baked in the Vermicular Oven Pot 2.0. Buttery, salty, crispy on the bottom. My おふくろの味!
Prep Time 3 hours
Cook Time 20 minutes
Servings 10 bread rolls

Ingredients
  

  • 325 g bread flour
  • 6 g instant dry yeast
  • 50 g sugar
  • 50 g egg (roughly 1 egg)
  • 120 g milk
  • 30 g water
  • 5 g salt
  • 40 g softened butter (in the bread dough)
  • 100 g butter cubes (to roll into the dough balls)

Instructions
 

  • Heat the milk and water mixture until it’s between 41°C and 46°C (105°F to 115°F). This is the sweet spot for activating yeast, so don’t let it go hotter than 46°C or you risk killing the yeast before it even gets started.
  • Measure out your bread flour and split it evenly between two bowls. We’ll call them Bowl A and Bowl B.
  • In Bowl A, add half the bread flour, the instant dry yeast, the sugar, and the whisked egg. In Bowl B, add the other half of the bread flour, the salt, and the butter.
  • Pour the warm milk and water mixture into Bowl A and mix thoroughly until there are no more clumps.
  • Add Bowl B into Bowl A and mix right in the bowl until everything comes together into one large dough. Fair warning, it’ll be sticky!
  • Turn the dough out onto a clean countertop and knead for at least 15 minutes, until it passes the windowpane test (stretch a small piece thin, if you can see light through it without tearing, you're there). If you are using a stand mixer, follow the same steps but just start checking after about 5 minutes!
  • Let the dough proof for about an hour at room temperature, or until it roughly doubles in size. My personal shortcut: 25 minutes at 40°C (about 100°F) if you want a faster, more controlled rise, totally up to you!
  • Lightly punch the air out of the dough and divide it into 10 even dough balls, about 60g each. Let them rest on the counter for 5 to 10 minutes.
  • Roll each dough ball into a circle with the center slightly raised. Place pieces of butter around the edges, then roll it up toward the center, pinching the bottom well to seal. Arrange the rolls in an oven-safe pot lined with parchment paper. I highly recommend the Vermicular Oven Pot 2.0 here for the crispy bottom!
  • Let the dough proof for another 30 minutes at room temperature, or 15 minutes at 40°C. This is a good time to start preheating your oven.
  • Brush the tops of your dough balls with egg wash, and if you’d like, sprinkle on a little sesame seeds or salt.
  • Bake at 190°C (375°F) for 18 to 20 minutes, or until the tops are a deep golden brown.
  • Once out of the oven, let the bread rest in the pot for at least 15 minutes. This lets the crust re-absorb all that buttery goodness that oozed out during baking, so you get that perfectly crispy, delightful crust.
  • Once the butter is fully absorbed back into the crust, remove from the pot and dig in!

Leave a Reply

Your email address will not be published. Required fields are marked *

Recipe Rating